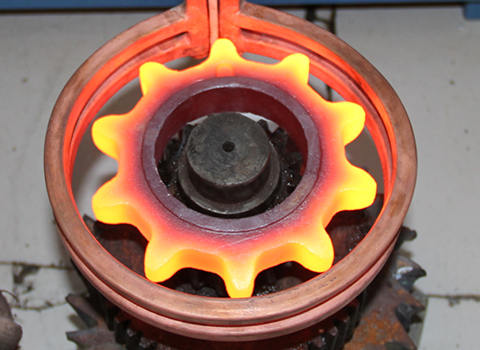
The camshaft is an important part of the automobile engine mechanism. Its main function is to open or close the valve for a certain period of time. During the working process, the camshaft not only bears bending and torsion loads, but also mainly bears alternating extrusion stress and wear of the tappets. Observe the effect. The camshaft material is No. 45 steel, and the surface is strengthened by medium-frequency induction annealing and quenching of a circular inductor. During production, it was found that quenching cracks occurred during cam quenching, the quenching hardness layer in the tangential direction did not meet the requirements, and the workpiece rejection rate reached 28%.
When inspecting the fracture surface, it was found that the macroscopic fracture surface showed a bright gray metallic luster. It has a granular structure and its cracks collapse along the arc of the peach tip, which indicates that the cracks originate from the inside of the hardened layer.
Analysis believes that the quenching cracks at the cam tip are related to the following reasons:
(1) The cross-sectional size of the cam lobe changes greatly, which can easily cause stress concentration during quenching and heating.
(2) Raw material defects. After inspection, it was found that 38.5% of the carbon content in the workpiece material exceeded the standard. As the carbon content increased, the tendency of the workpiece to be quenched and cracked increased.
(3) The cold working stress of the workpiece causes residual stress in the workpiece. When the workpiece is induction heated and quenched, it superimposes with the thermal stress tissue stress, causing the camshaft to be brittle. The cold working residual stress increases the risk of quenching cracks.
(4) Influence of the shape and size of the sensor design. The original design of the circular sensor is 58x12mm in diameter. not effectively. During medium-frequency heating, the temperature of the peach tip is relatively high, and the temperature difference between various parts is large. After water spray cooling, it was found that a large number of martensite structures with uneven carbon content appeared in the quenching layer structure. Among them, the low carbon martensite was black, and the colored area was the martensite structure with higher carbon content. Different structures cause the tensile stress peak at the tip of the workpiece formed by the superposition of tissue stress and cold processing residual stress of the workpiece after medium-frequency induction heating quenching and located inside the hardened layer, causing quenching cracks in the workpiece.
Based on the above analysis, the process improvement measures and countermeasures are proposed as follows:
(1) Strictly control the material composition and mechanical properties of the workpiece. The mass fraction of carbon should be controlled between 0.43%-0.48%
(2) Optimize preliminary heat treatment. The grain size of the workpiece blank should be 6-8 after normalizing.
(3) Using a figure-8 shaped sensor. Tests have shown that when circular and arc-shaped sensors are used, there are many cracks at the tip, which cannot meet the technical requirements. After using the figure-8-shaped sensor, the temperature difference between the tip and other parts is small, and the effective circle of the sensor is made into a large chamfer. Assembling, the chamfered parts are equipped with water spray holes, the cooling is uniform, the quenching structure is excellent, and the technical requirements are met, and the quenching and hardening layer of the device is uniform.
After adopting the above improvement measures for the medium frequency induction heating quenching of the camshaft, the quenching structure of the workpiece is good, the performance of the workpiece is excellent, the quenching cracks at the peach tip are basically eliminated, the workpiece yield rate reaches 97%-98%, and the production runs well.


 en
en  cn
cn  jp
jp  ko
ko  de
de  es
es  it
it  ru
ru  pt
pt  vi
vi  th
th  pl
pl 


 GS-ZP-1200


