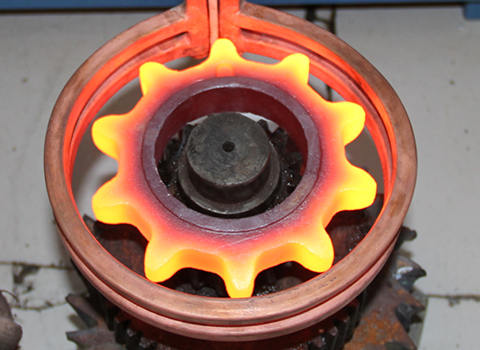
Gears are widely used in industry. In order to meet the needs of the work, many manufacturers use medium frequency induction heating power to quench and heat treat it in order to improve its hardness, wear resistance and service life. So, what is the quality of the gear after quenching? At this time we need to conduct quality inspection on it. There are many contents of quality inspection. Today, the editor will tell you how to inspect the low-magnification structure of the quenched gear.
Low-magnification structure (macrostructure) inspection is an inspection that is conducive to observing the internal structure and defects of metal materials with the naked eye or under a magnifying glass below 10 times. Commonly used methods include fracture inspection, low-magnification inspection, tower turning hairline inspection and sulfur print test.
1. Fracture inspection. Based on the fracture surface of the material, defects caused by the material during the smelting or processing process are checked, such as bubbles, shrinkage cavity residues, slag inclusions, delamination, cracks, coarse grains and white spots, etc.
2. Low magnification inspection. After the material sample is etched with acid (or alkali), its surface is observed with the naked eye or a low-power magnifying glass. It is mainly used to check defects such as segregation, looseness, bubbles, cracks, white spots, inclusions, and shrinkage cavity residues in the structure.
3. Tower-shaped turning hairline inspection. In order to expose the hairline defects inside the material, the steel is turned into a cylindrical sample with three steps according to a certain size, and then the hairline on the sample is observed with the naked eye or a magnifying glass below 10 times, and the hairline is determined according to its number and length. Assess quality. It is generally only used for internal defect inspection of steel materials for special and important purposes.
4. Sulfur print test. Its purpose is to directly test sulfur and indirectly test the segregation or distribution of other elements in steel. The inspection method is to use treated silver bromide photographic paper and wipe the clean sample surface closely for 1-2 minutes, and observe after fixing.
Now that you understand how to inspect the low-magnification structure of quenched gears, will you be able to inspect the quality of gears more accurately? As for how to conduct other inspections, you may wish to read more books on heat treatment. I believe you will gain a lot.


 en
en  cn
cn  jp
jp  ko
ko  de
de  es
es  it
it  ru
ru  pt
pt  vi
vi  th
th  pl
pl 


 GS-ZP-1200


